For this week
group 6 continued to work on the project to prepare for their performance that
was two days later. The team had completed everything. This included
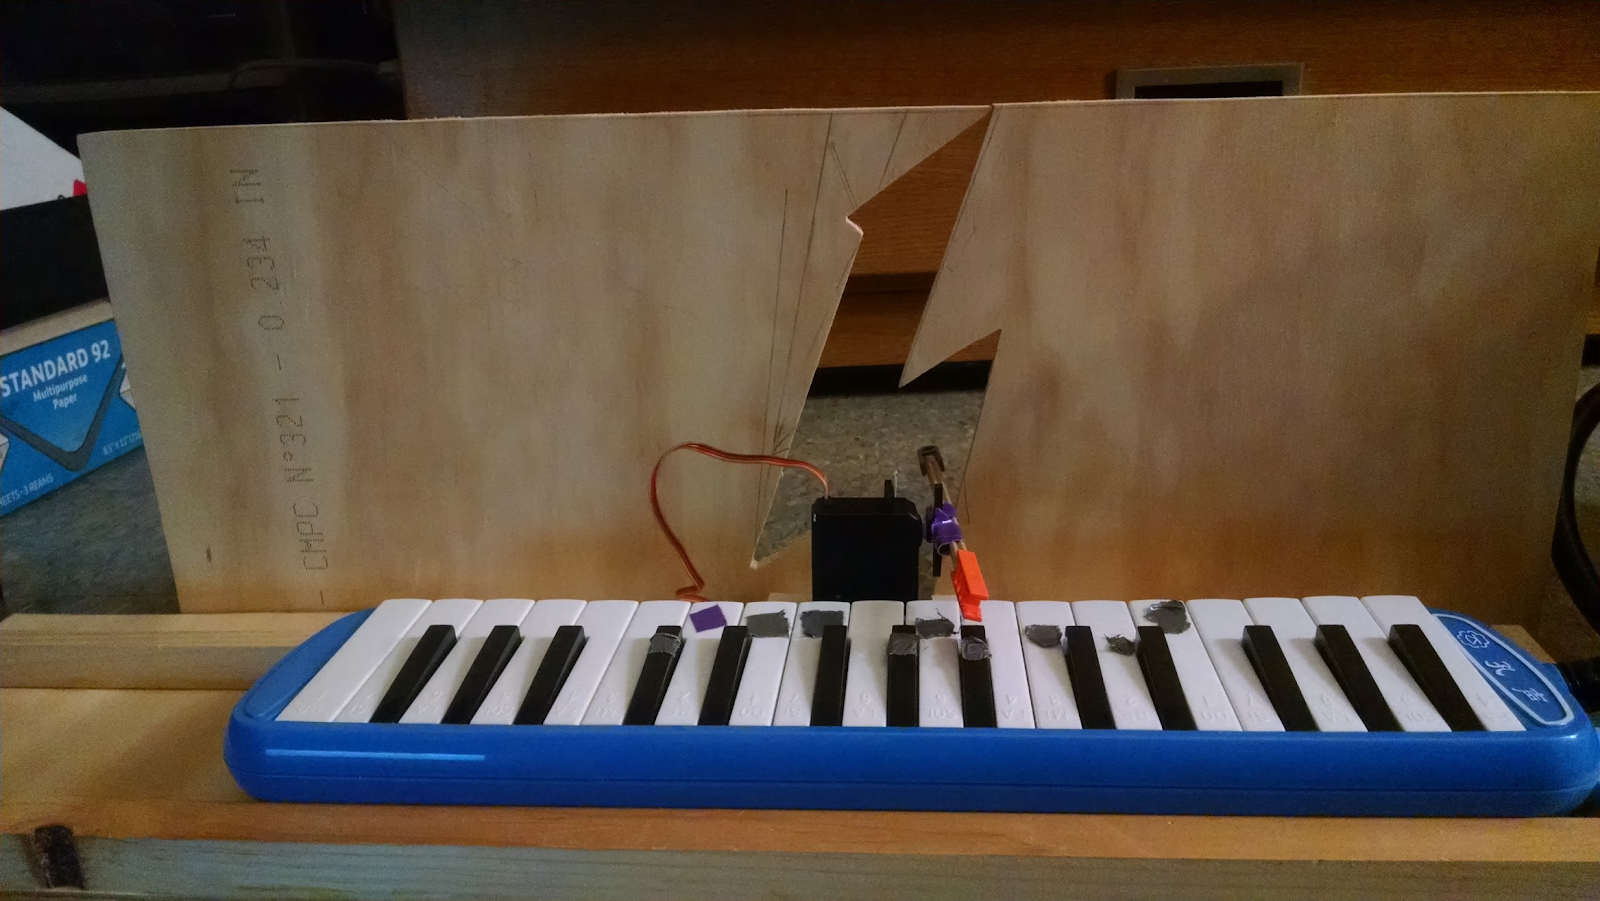
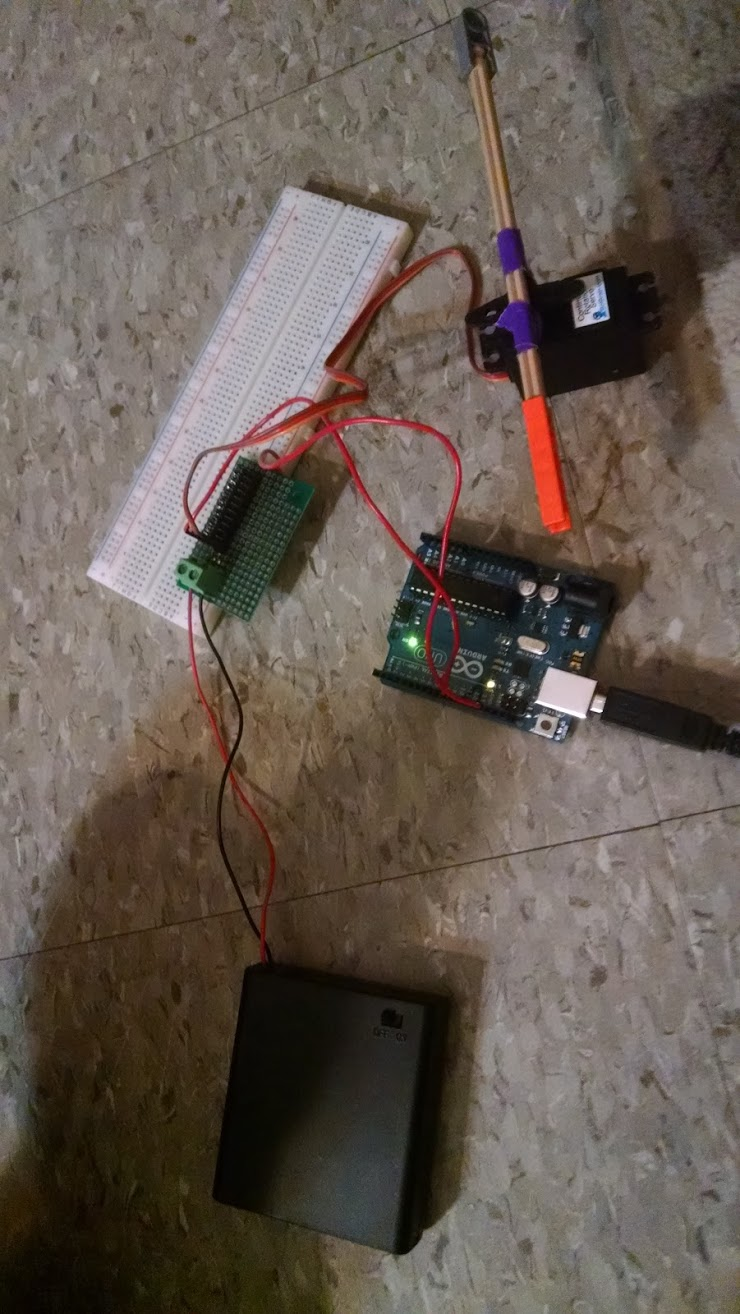
the coding of the arduinos and the mechanical set-up of the arduinos onto the
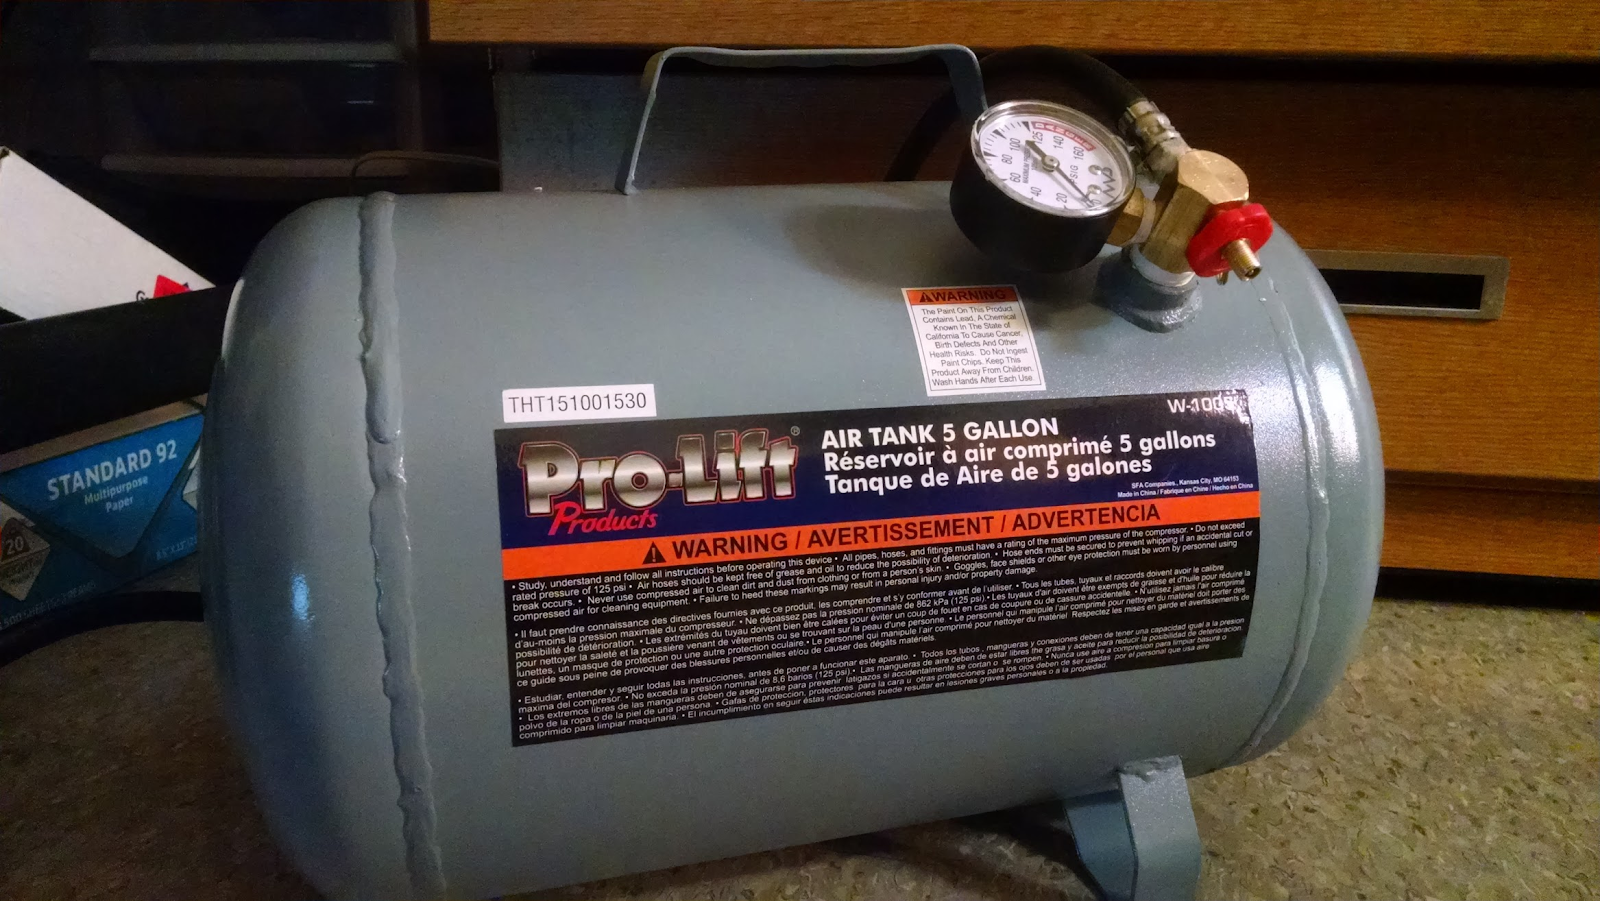
melodica as well as the connection of the air tank to the melodica and how to
control the air pressure of it going into the melodica. Group 6 also figured
out how to refill the air tank with air. The group once again purchased the
necessary parts to make this happen. Two days later was the performance. On
this day, group 6 gathered their materials to the black box theatre. Afterwards
they had everything set-up. When the group was trying to refill the tank, they
realized they purchased a wrong part so it did not connect to the compressor. A
team member from group 6 had then rushed over to the nearest hardware store to
find to perfect part. When this teammate came back the air tank was filled up
with air again and that issue was resolved. Shortly after, group 6 noticed they
needed someone to open the valve of the air tank. This was due to the fact that
the air in the tank only lasts for about two minutes and group 6 does not play
their part until near the end of the song. Thus, they had one of their members
hide under a table with the air tank so it will be turned on when needed. With
this issue resolved, the performance went very well.
Group 064-06: Robotic Symphony
Wednesday, June 1, 2016
Tuesday, May 24, 2016
Week 8
At the beginning of Week 8, coding was coming into process of being done. On that Saturday 9 hours were spent on coding. The music was finally finalized for each instrument, and it was now time to code. This required each note to be played in the order given and to make sure it worked perfectly. During lab of that week, it was discovered all you had to do was code where each note goes to be played, this was okay for the coder of the group had already done this, and just copy and pasted each note into the new software. When one of the lab TA’s found out about using double motors for coding. He had decided his formula for coding would not work and asked the coder to come to ExCITe center to work there. So that Friday, the coder went to the center, and worked on the new code with the TA. The TA then helped finish the code and make sure it worked for the group which then ended the week.
Week 7
During lab, the group filled the air tank with pressurized air at around 80 pm. Since a connector piece had not be created yet to attach the melodica and tank, the mouth hole of the melodica was just held in place over the air tank spigot. The group wanted to test how long it would take for the 5-gallon tank to run out of air at 80 pm while still being able to produce a sound from the melodica. When the air was released, the sound made by the melodica was extremely loud, and ran out in a minute. It was clear that the tank needed some type of regulator in order to control the pressure at which the air was released, and make it possible for there to be enough air to last the entire arrangement of the Harry Potter Theme Song, which is approximately three minutes long. To find a regulator, and possibly a nozzle for the end of the air tank hose, two members of the group ventured to Home Depot. The Pro-Lift air tank was bought through Amazon, and not Home Depot, so it was a little hard to know what specific pieces would actually be required. The original nozzle was taken off using a wrench in order for to decide the size of the female and male plugs needed. Unfortunately, there were not a lot of individual pieces for sales, so most of the items had to be bought in kits. The group also to buy black paint spray, to paint the melodica wooden platform and make it look more classy.
After the wooden platform had been painted and dried, the Arduino servos were secured using duct tape. A K’nex piece contraption was also built, so that the melodica would not shift from its original position of the platform. During this week, it seemed nearly every physical aspect of the robot came together.
Week 6
During week 6 programming began to test out how the arduino would work with melodica. It was very efficient and we programmed a few random notes because notes were not officially assigned yet to the group. We came up with the idea of placing a servo motor on top of another in order to play more notes with the same servo. The wooden track that we built was then shortened to fit the melodica. Using several K'Nex pieces, we created a stopper for the melodica so it won't be too mobile while playing. We utilized a lot of duct tape to achieve what we wanted.
Tuesday, May 3, 2016
Week 5:
The class was highly encouraged to utilized Arduinos for the project in order to make it easier to control all of the robots from one motherboard. In response, the NXT robot design was aborted, and the group researched how Arduinos work and function. One Arduino Uno has the ability to run eight servos at a time, such as eight motors. The group decided to construct a platform out of sturdy wood for the melodica to be placed on, as seen in Figure 1. Servo motors will be staggered along the platform on a tiered K’nex piece structure. The melodica will remain stationary, but the platform was designed so that it could also serve as a track for the melodica to move along if possible. The perk of having the melodica move would be that the robot could play more than eight musical notes, since the motors would then be enable to push down on more than one note. The servos will have rods attached to them, and will placed as close to the melodica keys as possible, allowing a greater torque, and thus more force.
The air tank arrived in the mail also arrive this week (Figure 2.). It will have to be filled, and tested before the actual performance. It is important that the mouthpiece of the melodica and the air spigot are held tightly in place in order to produce the best sound. At the moment, the spigot and the mouthpiece do not fit properly together, thus some sort of membrane must be used to hold them together.
Since the music parts have not been assigned yet, the group has focused on learning how to program the servos properly so that the drum sticks hit the keys reliably and at a force that sounds musically pleasing (Figure 3. In the upcoming week, the group needs to program the servos to play the assigned music part.
Figure 1. Melodic sitting on the constructed wooden platform.
Figure 2. Purchased Air Tank. |
Figure 3. Working on programming Arduino Servos. |
Week 4:
This week Group 6 focused on remodeling our NXT robot. The initial design did not work out after numerous trials and errors. The issue was that the robot was tilted sideways, it was not parallel to the surface it was on. This tilt was due to the uneven surface of the motor that supported the wheels. Group 6 tried to level out the robot, but we were not able to. Thus, it was decided to take the whole robot apart and start again. This time the base was created first to assure a leveled robot, as seen in Figure 1. In addition to creating a leveled out base, it was agreed upon to use gears for the wheels since the group hopes to create a track. This track will allow the robot to have a much more stabilized road to acquire better precision when it hits the keys on the melodica. A picture of the track is seen in Figure 3. There are four long orange rods present because the wheels will be running between a pair of rods.
As for our top part of the robot Group 6 will be using two motors with attachments to hit the keys as seen in Figure 2. Wheels with rubber around them were used to minimizes the chances of slippage when pressing the keys. The motors will move these wheels in a up and down motion to hit the keys. This top piece will be attached to the base, creating the whole piece.
Figure 1. Base of robot
Figure 2. Top of robot
Week 3:
During week 3, Group 6 programmed the NXT Robot to move a few inches and then play notes at random. The pneumatic part of the organ was dealt with manually; one of the group members simply blew air into it. It was originally put on a track which was created using Lego pieces and duct tape. This track, as seen in Figure 1, was put in place to circumvent the problem of having the NXT go where desired. Using the Lego pieces for the track was not very reliable so we decided to go with the idea of buying a gear track which serves for better control.

Figure 1. Track made out of Lego pieces.
Subscribe to:
Posts (Atom)